
Do It Yourself Loft Conversion: A Complete Guide:
A DIY loft conversion is one of the most practical ways to transform unused attic space into a valuable part of your home while saving money. Whether you’re planning a do-it-yourself loft conversion for a new bedroom, home office, gym, or dining area, the project can add both comfort and long-term value to your property. For inspiration, see this Stunning Loft Conversion in Worthing.
But, if your mind is buzzing with questions like:
- How can you do a loft conversion yourself?
- What will it cost?
- Is it even worth it?
- And how to begin?
Welcome! You’re at the right place.
Today, we’ll discuss a step-by-step DIY loft conversion, its cost, regulations, benefits, some of the disadvantages, and what skills you actually need to have to do this yourself.
Can You Do a Loft Conversion Yourself?
Honestly, yes, especially if it’s a basic-level conversion and you have the right skills, and do careful planning. But, if it’s a major loft conversion involving steps like roof altering, joists strengthening, or installation of a staircase, it’s better to involve a professional to make sure your loft meets UK safety and compliance regulations.
Now, let’s see some basic skills that qualify you for a DIY loft Conversion:
- It’s a matter of your home! So, honestly, judge your skill by understanding the complete procedure and question if you can do it easily?
- DIY loft conversion usually takes 4-10 weeks, including planning, design, understanding regulations, materials, managing electricity, plumbing, etc. Consider if you can dedicate this time realistically to completing your loft conversion.
- Understanding building regulations is the most important point to consider while doing loft conversion yourself. Because non-compliance can result in fines and legal concerns.
- We know that apparently DIY seems cost-effective, and even if it is, consider the fact that if any error occurs during the DIY loft conversion, it can cause you to spend more money than saving it.
If you’re uncertain or need help in planning, you can contact Sussex County Construction anytime!
Is Your Loft Suitable For a Conversion?
This is the first step when planning a DIY attic conversion. You must check if your home meets the basic requirements set by UK Building Regulations. For detailed guidance, see the latest loft conversion regulations in West Sussex.
- Minimum height for a loft conversion is 2.2 meters.
- Adequate space for conversion.
- Ensure your roof has at least some layer of felt fitted under the tiles. It’s important for weather-proofing your roof to avoid cracks.
- Consider the load-bearing capacity of the ceiling floor below your loft to ensure safety and durability.
- Evaluate your roof structure, its type, the pitch, and other obstructions such as chimneys and tanks.
If you have limited roof space or need alterations, it’s wise to seek professional help to fix these issues before doing the loft conversion yourself. This is known as a shell loft conversion.
Shell Loft Conversion:
Actually, a shell loft conversion is a type of loft conversion where the experts handle the complete structural framework and important external work. In short, the shell loft conversion includes the following services:
- Structural alteration
- Roofing issues such as height or type, etc.
- Managing insulation and ventilation.
- Installing windows.
- And installing the access to the loft, such as a staircase, etc, depending on your contract with them.
Please note that, in a shell loft conversion, interior tasks are not included, such as:
- Plastering
- Electrical work
- Plumbing
- Decoration
- Furniture
So, homeowners have to manage interior finishing themselves.
So, honestly advising if it’s a basic level loft conversion, do it yourself; if it’s technical or needs structural alteration, go for a shell loft conversion. This way, you can save both time and money, also avoiding the risk of potential error or non-compliance.
Now, if you’ve decided for diy attic conversion, let’s see the steps in detail.
Step-by-Step Process of DIY Loft Conversion:
Step 1: Permits and Regulations
The good news is you don’t need formal planning permission for your DIY loft conversion. It’s because most of the loft conversions fall under permitted development rights unless your property is in a conservation area or AONB ( Area of Outstanding Natural Beauty).
According to permitted development rights, you need to follow the following criteria for a loft conversion:
- The new space must not exceed 40 cubic meters for terraced homes or 50 cubic meters for detached and semi-detached homes.
- Your loft conversion should remain within the plane of the existing roof slope on the front of the house.
- The dormer windows must be set back at a minimum of 20cm from the eaves and must not extend beyond the original wall.
Also, it’s important to check local building regulations for compliance.
Step 2: Choosing The Right Loft Conversion Type
Once you are done with planning, regulations, and permits, the most important factor now comes, which loft conversion type you should choose, especially for a DIY loft conversion. This factor depends on your budget, your purpose of conversion, and the type of your house. Some common types of loft conversion are:
VELUX Loft Conversion:
A VELUX loft conversion is one of the most budget-friendly options, making it ideal for do it yourself loft conversion projects. Also called an internal loft conversion, it requires minimal changes to the roof. For a detailed breakdown of design and pricing, check the VELUX loft conversion cost.
You can do it easily by installing a roof light or VELUX windows on your roof slope. Internally insulating your attic. Strengthening your floor. You can install a staircase to access the loft.
Dormer Loft Conversion:
In a dormer loft conversion, a dormer window is added to increase headroom and floor space. This type is one of the most common when converting a loft DIY, as it offers flexibility and added light. Learn more about the dormer loft conversion including costs, design choices, and benefits.
Single Dormer:
If your area falls under conservation districts, this dormer type is best for you.
Two Single Dormers:
Similarly, if you want more space, you can use two single dormers. It’ll also add symmetry to your home.
Full-width Dormer:
This type adds unique and extra space to your home.
L-shaped Dormer:
As the name indicates, in this type, two dormer lofts are joined together to form an L-shape. It’s best for Victorian Properties with a rear extension.
Hip-to-gable Loft Conversion:
It’s best for detached and semi-detached homes. This dormer type usually extends the roof by replacing the sloping end with a vertical wall. This loft conversion is perfect if you want significant space in your loft.
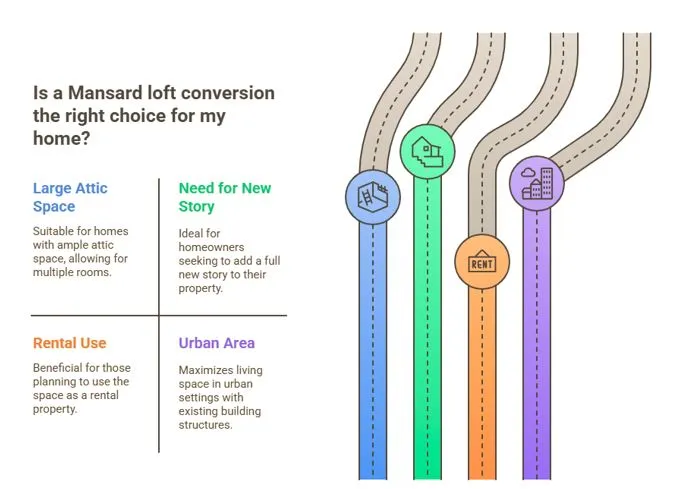
There are also advanced loft extension types such as Mansard and prefabricated conversions, though these are generally beyond the scope of DIY. Usually, these types are above the scope of DIY loft conversion projects, but suitable if you go for shelf left conversion because:
- A Mansard loft conversion involves significant roof changes to create a vertical wall and flat roof.
- Similarly, in a prefabricated loft, your existing roof is completely replaced with a larger roof. It’s best for lofts having limited vertical space.
With that being said, once you decide on your loft type, the next step is to design your loft conversion.
Step 3: Design Your Loft Conversion
Now, it’s time to properly plan and design your DIY loft conversion. Such as:
- Plan the layout
- Finalize how you want to use this loft
- Location for windows
- Plan utilities like insulation, plumbing, and electricity.
- Last but not least, how you’ll access the loft.
While planning, make sure your design meets UK building regulations and Safety Standards.
While planning and designing, DIY loft conversion kits can be of great help!
DIY loft conversion
It’s a valuable pack of materials and components used in a loft conversion. It basically aims to simplify the process of converting a loft into a usable area of your home. The kit includes:
- Structural elements
- Windows
- Insulation material
- Flooring
- Staircases ( depending on the kit type and price)
For different types of loft conversions, there are different types of DIY loft conversion kits, and you can choose the one that meets your needs!
Step 4: Ready the Loft Space
Prepare your loft space now. Do cleaning, remove old insulation, and empty the roof. This will help you understand the existing structure and any potential issues, if present.
Step 5: Strengthen the Floor Joists
The strength of the floor is very important from the aspect of safety and durability of your loft. Even if you’re planning for DIY loft conversion, for this specific step, you can consult expert builders to ensure regulations.
Strengthening the floor joists supports the additional weight of the conversion more efficiently. To strengthen your joists, you can add new beams or reinforce the previous ones. It guarantees safety and stability for your new loft.
Step 6: Choose The Right Flooring
You must choose the right flooring material for your loft. It usually depends on how you intend to use your loft. There are some common flooring types you can choose from:
Engineered Wood:
If you’re looking for a temperature-resistant and durable floor for your loft, go for engineered wood. It also naturally adds aesthetic value because of its hardwood appearance.
Vinyl Planks:
If you aim to use your loft as a bathroom or utility area, choose tiles or vinyl planks because they are low-maintenance and moisture-resistant.
Laminate Material
It’s a versatile option and one of the best flooring materials for DIY loft conversions because it’s easy to install. Also, it closely resembles wood or tile; you can choose accordingly.
Carpet:
If you want to use your loft as a soothing study room, a warm bedroom, or a family lounge, you can use carpet flooring.
Step 7: Install Insulation, Windows, and Ventilation
If you want to make your loft energy-efficient and safe, do proper insulation between the rafters, around the walls, and under the floor boards. You can use high-quality insulation materials such as PIR board, multifoil insulation, sheep, and mineral wool.
For proper ventilation, sunlight, and natural scenery, add windows. Just make sure that you use properly sealed windows to prevent drafts and moisture problems.
Step 8: Fixing Electrics
Do the electrical fixing for your loft right away. Fix wiring, lighting, and heating properly. You can consult a certified electrician for this process and ensure that you confirm beforehand that they can offer a BS7671 test certificate for your loft after electrical installation.
Step 9: Fitting the Plumbing
If you’re planning to use your loft as a washroom, kitchen, or anything else that needs a water supply, you can do the plumbing at the time of the loft conversion.
Step 10: Ceiling and Internal Walls
If you need internal walls, you can construct them now and then add plasterboard to the walls and ceiling. And this is the point where your loft will take its shape!
Step 11: Install Loft Stairs
Install loft stairs to access your loft easily. Make sure your loft stairs comply with building regulations. Ideally, the best approach is to add a new staircase exactly above your existing stairs for beauty and coherence.
Step 12: Final Touches
That’s it, now you’re very close to the completion of your DIY loft conversion. Just give the final touches like furniture, decoration, or other essentials to convert your dream into reality!
Step 13: Final Inspection
Now, once you have done your DIY loft conversion, it’s wiser to get it inspected by a loft conversion expert. It ensures there is no mistake, no potential risk, and your loft complies with building and safety regulations.
Step 14: Compliance Check
Lastly, it’s illegal to convert a loft without following UK building regulations. Non-compliance can lead to:
- Heavy fine
- Legal penalities
- Difficulty in selling your home
- Undo the work in worst-case scenarios
Hence, it’s important that you take care of these points from the beginning to protect your home and money.
Cost for a DIY Loft Conversion in the UK
Though the actual cost of a loft conversion can vary depending on your home, design, and structural changes, here’s a quick comparison for DIY projects:
| Loft Conversion Type | Average DIY Cost (UK) | Best For | Difficulty Level |
| VELUX Loft Conversion | £10,000 – £15,000 | Budget-friendly, minimal roof changes | Beginner–Intermediate |
| Dormer Loft Conversion | £20,000 – £30,000 | Extra headroom & floor space | Intermediate |
| Hip-to-Gable Conversion | £25,000 – £35,000 | Semi-detached & detached homes | Advanced |
| Mansard Loft Conversion | £30,000 – £40,000 | Maximum space, major roof changes | Professional / Shell Conversion |
Advantages and Disadvantages of Do-It-Yourself Loft Conversion:
Advantages of DIY loft conversion are as follows:

- It’s cost-saving.
- You can customize your loft according to your needs and your intentions. It’s a remarkable feeling to convert a useless portion of your home into something incredible with your hands.
- You can do it at your own pace with flexibility.
- You’ll learn a lot that can add to your knowledge and experience related to home improvement projects.
While a basic DIY loft conversion is doable without any disadvantages, especially with proper planning but still, consider the following disadvantages in mind:
- If your skill isn’t up to the mark, it can create a constant strain on your mind. What if I make a mistake?
- Certain factors, like installation, plumbing, and electrical fixes, are important and must be done by experts. Don’t try to do this yourself; otherwise, even a minor issue can cause massive problems.
- A DIY loft conversion is a time-consuming project. Make sure you can adjust it properly, and if you’re doing it alone while managing your professional life, it might expand to months, causing a prolonged disruption in your home.
- The initial goal of the DIY loft conversion project is cost-effectiveness, but unexpected mistakes can lead to increased cost.
We hope the article provides you with thorough guidance on how you can convert your loft into valuable space yourself!
Still, if you feel stuck at any stage or want professional support beyond your diy loft conversion, our team can help. From local loft conversion services to building contractors in Sussex, we’ve completed projects across Worthing, Chichester, Brighton, and Littlehampton. Get in touch with our experts today.
Frequently Asked Questions about DIY Loft Conversion
Q1: Do I need planning permission for a DIY loft conversion in the UK?
In most cases, no. Many projects fall under permitted development rights. However, if your home is in a conservation area or you’re changing the roof shape significantly, planning permission may be required. Always check local loft conversion regulations in West Sussex.
Q2: Can I really do a loft conversion myself?
Yes, a do it yourself loft conversion is possible if it’s a basic design like a VELUX or small dormer. However, major work such as joist strengthening, roofing, or staircase installation is best left to professionals.
Q3: How much does a DIY attic conversion cost?
On average, costs start around £10,000 for a simple VELUX loft conversion and can reach £40,000 for complex types like a Mansard. Use our cost of loft conversion guide for detailed breakdowns.
Q4: How long does converting a loft DIY usually take?
Most projects take between 6–10 weeks, depending on design, approvals, and whether you outsource electrics, plumbing, or finishing work.
Q5: What’s the difference between DIY loft conversion and hiring builders?
DIY projects are cost-saving and flexible but carry risks if mistakes occur. Hiring Chichester builders or building contractors in Sussex ensures compliance, faster timelines, and professional finishing.
0 Comments